


Toby Brown
Toby is the owner of Lingley Bros. Sweetcorn since 2000. A 1989 graduate of Hoopeston East-Lynn High School, he began farming in 1993, the sixth generation farming the ground he lives on. He and his wife Paige have four children: Jenna, Katie, Josh and Megan. Together they raise 48 acres of sweet corn, 900 tomatoes and a half acre of green beans. In addition to farming, Toby is an Elder at Good Shepherd Lutheran Church in Hoopeston, an officer on the Rossville Area Fire Department, assistant 4-H leader of Hoopeston Boosters 4-H club and a beekeeper.
Sweetness and flavor
Sweetness and Flavor
As sweet corn matures, the kernels pass through the stages of water, milk and dough. The sweet tender stage we like to eat is the milk stage. It is in this stage a only a short time in its life, in prime condition for just a few days. After that, the kernels begin to pass into the beginning of the dough stage where they become more solid and starchy (think "field corn") instead of juicy and sweet. Since this window of time is very brief, we we plant several successive plantings so we can always be picking corn at its peak flavor through the entire season. Under normal circumstances, we rarely spend more than four to five days in each patch of corn before we pass over to the next. Warmer weather hastens the maturity and speeds up this process, sometimes shortening a patch's life to only 3 days. You can see how challenging it is to have 70 days of perfect corn...always finding (let alone planning) a patch that is in a 3-5 day window. To make things even more difficult, some people like their corn on opposite sides of these 3-5 days. Some like it very young, immature (day 1 or 2) where the kernels are shallow and "pop" when eaten. Others like it more mature (day 4 or 5) where it begins to be deeper and "chewy". We try our best to accommodate everyone's tastes and, in reality, its nearly impossible to be any more accurate anyway. One other thing that makes the maturity of the corn a challenge to manage is that not all plants come up at exactly the same time. If there is a few days delay in some plants coming up, they will be "behind". Sometimes one end of the field will emerge before another or be delayed in emergence by water "standing" in an area. We sometimes go through these areas and find that the corn much different than it was just 200 feet ago. It all comes down to our judgement, both in the picking and in the selection during selling. We do our best to pick out what you want and like.
Filling out of the ear
Ear Fill
Once the corn has committed to the size and number of ears it will produce, the only change the plant can make if growing conditions worsen is the number of kernels that will be filled on the ear. If conditions stay ideal, the big ear gets all of its kernels filled and makes the type of corn we like to sell. If lack-of-moisture or high-temperature conditions begin to put the plant under stress, it will concentrate its efforts at the bottom of the ear, aborting the kernels at the tip. Remember, the corn is interested in making the greatest number of healthy kernels. It will produce 350 plump, healthy kernels not 700 half-filled, withered ones. In fact, if stress occurs late enough in the process, the plant may actually begin to relocate moisture from already-filled tip kernels toward the bottom of the ear. This makes those tip kernels appear shriveled, as if not "fresh" but it is merely a way for the plant to ensure healthy viable seed to reproduce.
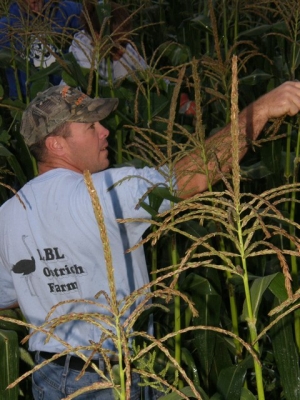
Before any kernel can be filled, it must first be pollinated. This occurs when the pollen from the tassel falls onto the silks of the ear. Each kernel has a silk attached to it, which serves as a transportation route for the pollen. If something interferes with this process such as insects eating the emerged silks, for example, some or possibly all of the kernels will go unpollinated and fail to develop into plump sweetcorn kernels. Instead, the cob will just remain flat where the kernel would have been. Pollination has a short window to occur, and is dependent on ample moisture (rainfall) to happen successfully. If it fails to pollinate during this window, it won't. One thing to keep in mind: pollination of the corn you are buying occurred three weeks ago. The weather we have now may be substantially different than it was three weeks ago.
The size of the ear
Ear Size
The size of the ear of corn is dependent on three things: growing conditions, soil fertility, and variety of corn. When the corn plant is about knee high, it evaluates the growing conditions and available nutrients and decides the size and number of ears it can produce well. Keep in mind the plant is interested in reproduction, not aesthetics. The goal of the corn plant is to make the greatest number of healthy kernels it can as seed for another generation. It doesn't know we are going to EAT it. When conditions are good, corn will be happy to take a crack at making a nice BIG ear with lots of rows and kernels. When conditions are less than ideal during this phase, such as a cold, wet spring or a hot dry summer, the ear size is a little more modest. Early and late-planted corn experiences this often, and can usually be expected to have smaller ears as a result. The other factor in ear size is the type of variety being grown. Some varieties tend to have longer, more slender ears while others are blockier with more rows. As a general rule, the faster or earlier maturing varieties have smaller ears because they have less time to grow. Since they are making an ear of corn in only 68 days versus 85 days for a "full season" variety, this translates to 17 more days of photosynthesis or 25% more energy for the plant to use to make the ear. So don't be surprised that the very first corn of the year isn't what you remember from last year.
People
These are the people who put their heart into LBS. Without them and their hard work LBS wouldn't have been possible. As you will see in the slideshow, there are a lot of family that has been involved over the years as well as many good friends.
People of LBS
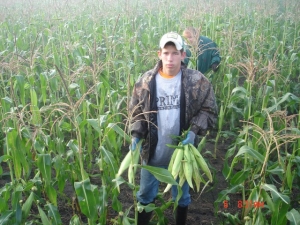
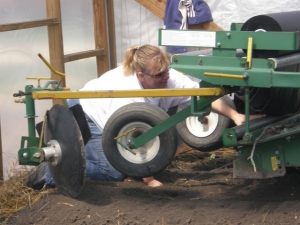
In the field
Every morning during the summer we can be found out in the field picking the day's sweet corn. We have a bit of a unique method, using recycled soybean bags to hold the corn and as a soft backboard to throw it against. We usually have a crew of between 5-8 people.
Here is a slideshow of us doing our thing:
In the field
Overview of our sweetcorn operation

Curious what goes into producing the corn you buy? Here is a quick look from start to finish what it looks like.
Overview
Seedlings
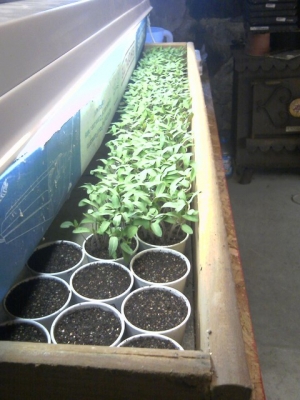
We start our plants from seed around the end of January. Sometime in February we begin transplanting them into their own cells. All of this is done in our basement using an array of shoplights and a tomato "incubator"
Here is a slideshow of our seedlings and transplanting process:
Seedlings and Transplanting
Growing
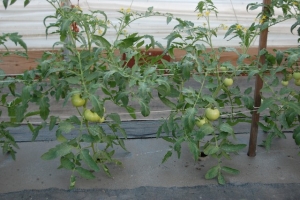
The plants are spaced 18" apart and planted through small holes poked in the plastic. The planting is done by hand. Our big tunnel holds 600 plants and the small one 300. Once planted they are covered with a row cover until night time temps are warmer. The plants are held upright with stakes and twine called a "florida weave".
Below is a slideshow showing our tomato crop in different stages:
Growing
Preperation
In order to grow tomatoes in a tunnel, we have to be able to get inside with tractors to till and to make raised beds. The ends of the tunnel are made to be removable and the sides are tall to accommodate our equipment. The beds are raised and covered with plastic for warmth, weed control, disease control and moisture conservation.
Below is a slideshow to see how we do this (click play button on right side of picture to start)
Preperation
Hightunnels
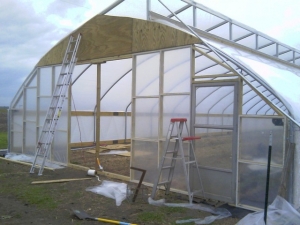
We grow tomatoes in high tunnels. What is a hightunnel? It is a plastic covered hoop house that sits over the field. It allows us to protect the young plants during the cold part of the spring. We are able to control the temperature inside by opening the sides, ends and a portion of the top. The best way I can explain it to gardners is a larger scale version of the "milk jug over your tomato plant" trick. Plants are grown in the same spot, in the same dirt, just with adjustable protection. They are expensive and considerably more work than planting outside but worth it.
Below is a slideshow of our tunnels to give you an idea. (click play button on right side of picture to start)
Hightunnels
- You are here:
-
Home

-
Daily Updates
- Toby Brown